I have moved to www.cardsinthetree.blogspot.com
Come join me!
Monday, February 21, 2011
Thursday, October 28, 2010
Happy Halloween! (Cricut Circle Challenge)
 This card was made for the Cricut Circle Blog's weekly challenge. This week vellum or plastic needed to be used in the design. Below is a Halloween card made with a vellum jar full of spiders. This idea has been floating around in head for awhile and with the challenge having to do with vellum I finally figured out how to do the jar and complete the design. The card itself is just a black cardstock. Layered on the black was a white cardstock was punched using Martha Stewart's Spiderweb edge and corner punch. Plain green cardstock was embellished with a mask made with Tim Holtz's blank masks cut into a spider web shape & green glitter mist and also with a cuttlebug embossing folder (the smaller edge pokkadot). Black and white ribbon covered some of the raised portion for a textured effect and a visual line for the jar to sit on. The jar was made with the Doodlecharms cartridge with the inside contours hidden. It was cut from vellum with some glossy accents applied to give it a shined on look. The spiders were cut at different size and some extra legs were also welded on to give the one spider 8 legs. Black sparkle fabric paint was use for their eyes for a 3-D look. The largest of the spider's legs were folded up to make him look like he was crawling on the paper and white fabric paint was to applied for his silk line. Happy Halloween was cut on yellow cardstock and orange ink was applied with a sponge for a faded, dimensional look. A few rhinestones were added for some fun bling. On the inside (sorry forgot to take pictures before I mailed the card out) There is a line of the white punched spider web again along the bottom and above it says "I hope your Halloween is crawling with fun!" Thanks for looking and wish me luck in to challenge. HAPPY HALLOWEEN!!!!!

Saturday, September 18, 2010
Meri's Pop-Up Elephant Card
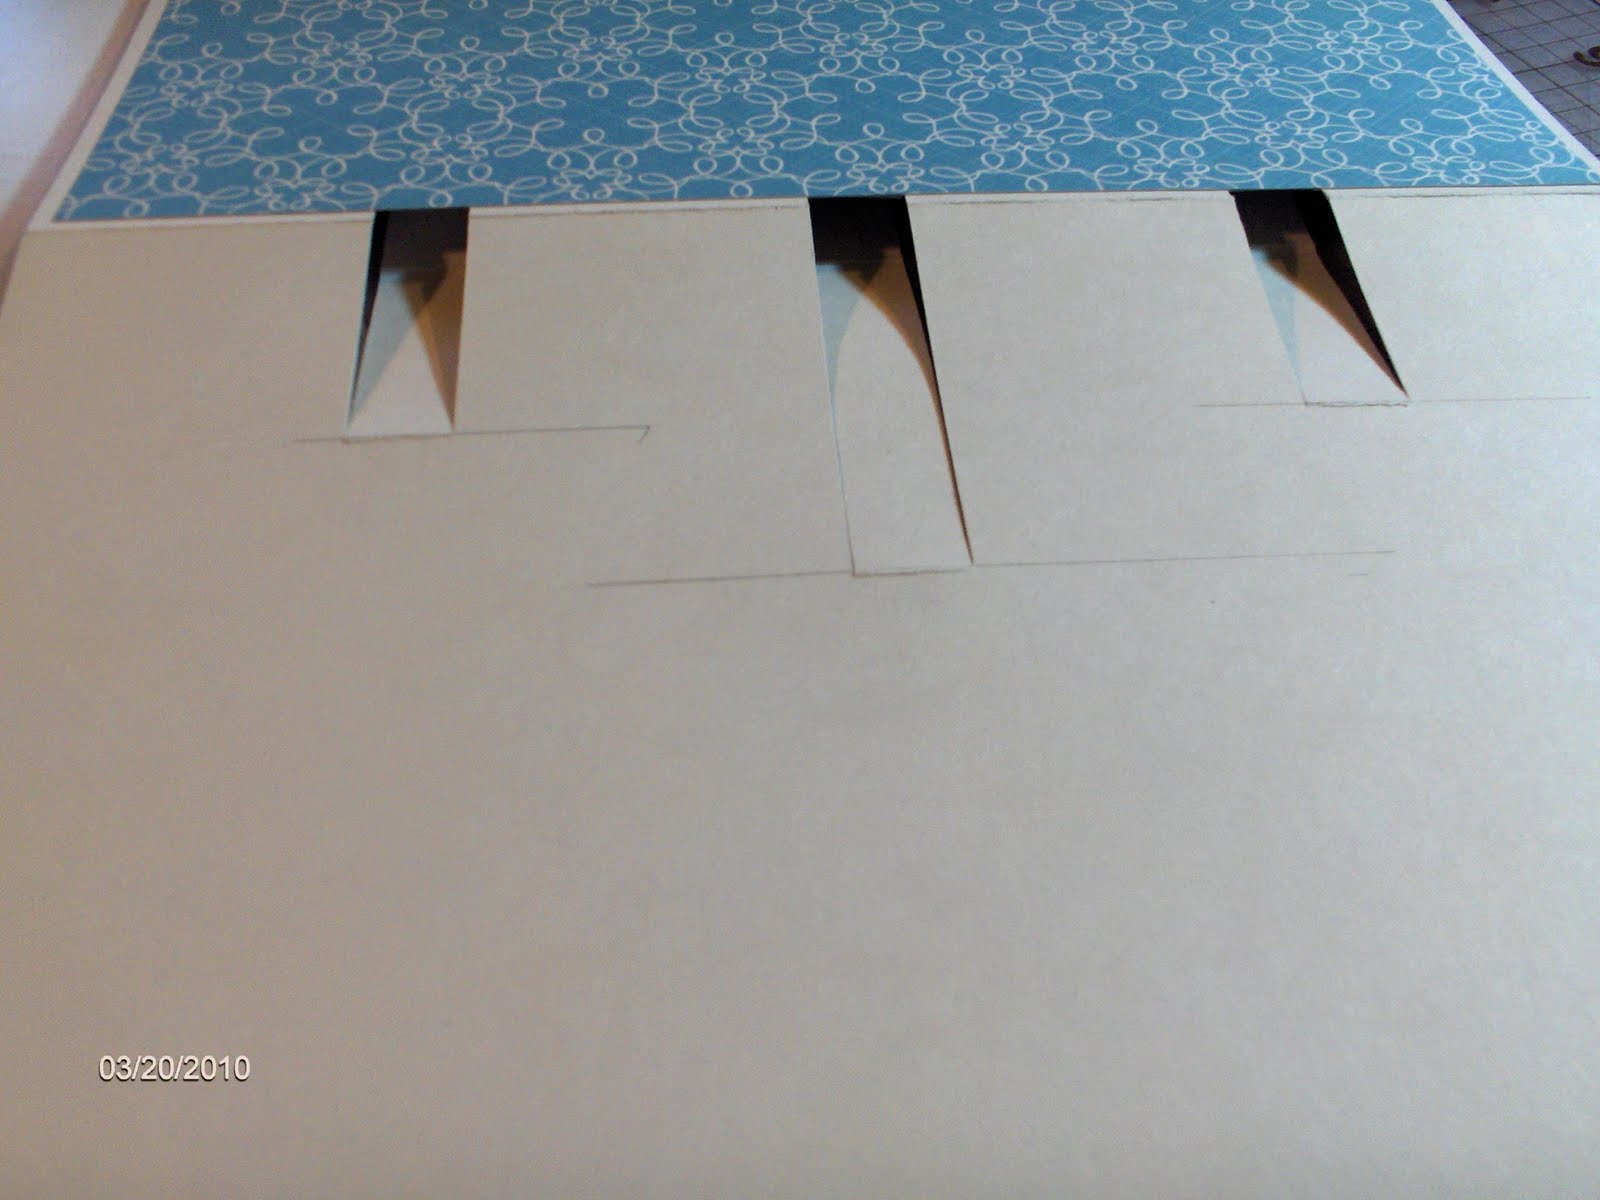


 For her birthday I made my younger sister a card with an adorable ellie and jungle theme. I started with cutting three strips into the folded section of the card. I line these cuts up with the paper that is the background and cut the


 same sections out. I keep those cut outs and place them under the folds. This gives the appearance of solid sheet and strengthens that fold. I also cut strips of that background (blue swirls) to cover the top of the pop-out piece. Using my gypsy I cut three trees once with green paper and once with the wood grained paper. I complete cut the trunk of the tree away from the tree top. I used an old leaf patterned punch to punch some different colored, textured greens for some dimensional leaves. I attached a row of grass on the pop-out before attaching the two smaller trees on each side. I then put another row of grass in front of the trees. Two rows of grass also sandwich the elephant. He was cute on pearled paper; google eyes, sparkle marker ear details, and silver glitter pen trunk details were added. A tree, grass rows, and Happy Birthday are on the front.
Friday, September 17, 2010
IT'S ALIVE!!!!
In the past months I have been so busy with camp, moving out of the old house into my parents house for a month, then moving to Maryland from Ohio, and starting to teach again. I have finally had some time to update this blog so I will be posting pictures of the few things I made before summer, some camp crafts and then the things I have crafted for my classroom the past few weeks. Check back soon, this blog is about to explode!!!
Friday, March 19, 2010
Mom's Trifold Birthday
For my Mom's birthday card I made a trifold on a 12 inch by 8 inch cardstock. Directions on how to make a trifold is posted here. The patterned paper is from the DCWV Linen Stack, my new favorite. The happy birthday was cut from A Child's Year cart and I used that font and welded "Momma" and the heart to "Alex". I glitterfied :) all of these and stuck them on the large main parts of the card. I kept it completely simple so that the paper and design of the card was what caught your eye.


Thursday, March 18, 2010
Trifold Directions
- This template shows you how to make the scores and cuts to achieve the 3-D look of the card.
- The red lines are where a cut needs to be made through the paper that makes the backing of the card.
- The blue lines are where a score line needs to be place for an easy, uniform fold and also as a sizing guide when decorating each block.
- The best size I have found to work is a sheet of cardstock measuring 12 inches by 9 inches. The smaller boxes are 3x2 and the larger ones are 3x4.
- *Tip* This card can be made using any size, using measurements that are easily divided by 3 work best.
- *Tip* Do not put thick and high raised embellishment on the right 2/3 of the card as it will not fold properly. However, a double scored vertical lines could create more of a book look to allow for larger embellishments.
- *Tip* Score the lines only, do not fold them until all of the paper, and embellishments have been added.


Sunday, March 14, 2010
Boss Birthday Card, Cake, & Shirts
I work at a summer camp for people with disabilities. Its our off season so there are only 3 of us until summer. My boss's birthday was coming up and he had just learned that I don't like to be near birds, fake or real. So this is the card I made for his birthday.


His daughters' birthdays are also on and around his so I made them this cake. They have faerie doors and now a faerie terrarium. The cake has a tree (camp logo) and some spring tulips on it. After learning about the faeries I added a faerie door at the bottom of the tree and some hidden faeries through the leaves and grass.


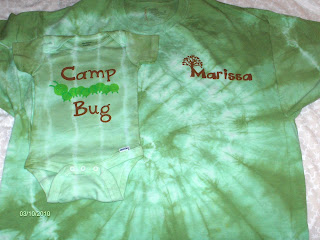
I also made the three of us in the office matching tie-dyed shirts that I used freezer paper to screen print the tree and our names on them. We also had Marissa and baby come visit (look at the banner, card, and diaper wreath made for them as well).


His daughters' birthdays are also on and around his so I made them this cake. They have faerie doors and now a faerie terrarium. The cake has a tree (camp logo) and some spring tulips on it. After learning about the faeries I added a faerie door at the bottom of the tree and some hidden faeries through the leaves and grass.


I also made the three of us in the office matching tie-dyed shirts that I used freezer paper to screen print the tree and our names on them. We also had Marissa and baby come visit (look at the banner, card, and diaper wreath made for them as well).
Subscribe to:
Posts (Atom)